Sunday, December 11, 2016

Interactive Google Slides Presentations!

This week in the Ed Tech world I decided to create a Google Slides presentation to present a How-To seminar on using Google Classroom for the first time. I thought I knew quite a bit about Google Slides already, but for this presentation I really combined a lot of other apps and features provided that I had never used before. I am even more of a Google Slides fan now than I was before and I can't wait to use this more with my students! 

To start, the Google Classroom 101 slideshow I created is below. If you aren't a user of Google Classroom yet and hope to be, this presentation would really benefit you! There are short tutorial videos for a variety of tasks and features within Google Classroom!


The biggest takeaway I had from diving into Google Slides further this week was that you can truly make an interactive presentation. I've always known that you can hyperlink videos, websites, and images, but I had no clue that you can actually hyperlink to other slides within the presentation itself! This means that you can create an index page with live links to other slides in the presentation for your users to quickly advance to any section of your presentation! This would be GREAT for students to quickly access specific information or "chapters" within a lesson! 

The screenshot below shows how to do this! 


I also really liked the idea of adding a "home button" on each slide that takes users back to the index page! In the Slideshow that I created, I hyperlinked an image that directed back to the index page of the presentation! This is just another interactive feature that makes the presentation easy to navigate and extremely user friendly! 

Give it a try in my Google Classroom 101 presentation above!
________________________________________________________________

Another great discovery this week about Google Slides is how many theme templates are available to download from the internet. I'm a BIG advocate for the aesthetic appeal of presentations, assignments, and instructions for both students and adults alike! Below are several great links to websites that offer many different Google Slides theme options!
________________________________________________________________

The last big ah-ha moment came in how easy it is to make tutorial videos and embed them into your own presentations. It should come as no surprise that any time our students want to learn to do something they turn to YouTube! Why do we not use this knowledge and the free tools available to capitalize on this more?! If you've not used Screencast-O-Matic before you need to install it immediately! It is a a FREE tool for recording screencasts, or the actions you are carrying out on your computer screen, as well as audio. This allows you to create simple How-To videos the SHOW how to carry out a task while you speak instructions or tips over the top. 

To make it EVEN easier, once you are done recording, Screencast-O-Matic allows you to directly upload your videos straight to your YouTube account!
 

Once your videos are on your YouTube account, adding your tutorials to your interactive Google Slideshow has never been easier! Simply "insert" a video on the slide and copy and paste the URL of your YouTube video! 

See the screenshot below!


By combining all of these features and tools together, I was able to create an interactive Google Slideshow that will be easy to navigate and extremely beneficial to new Google Classroom users. Imagine to possibilities of using this as an instructional tool in your classroom!

Saturday, December 3, 2016

Every teacher's FIRST question: Is it user friendly?!

If this isn't your first question when looking at a new online tool or resource to use with your students, then I'm not sure what is. (It definitely should be!) We've all asked ourselves this at one point or another. Thinking of ways to explain how to access or login to a resource to my students is where my head IMMEDIATELY goes when I'm exploring new tools. This week, I explored some ways to help ease that anxiety and and angst about user friendliness!


Allow me to introduce you to SYMBALOO! Watch the short video below for a full explanation on what Symbaloo is and has to offer you in your classroom!


Do you have several resources or tools that you already use regularly in your classroom? Does your team of teachers use different platforms or learning management systems? Are you working on a unit where students need quick access to specific resources and websites? Symbaloo is PERFECT for you. It creates quicklinks to all of your tools and because it is live it can be customized and changed at any point. And the biggest appeal of them all is the visual appeal that Symbaloo offers to your students. Not only are the "tiles" live links, but you can also customize the image on the tile so students can easily navigate where they need to go. Still not convinced? Take a look below at the webmix that I use with my students. I've updated it over the past two years to reflect the tools, resources, and websites that my 6th grade students will need throughout the year. 


So it answer the first question: Is it user friendly? ABSOLUTELY. Students are not required to login to anything when you send the link to your class Symbaloo. Even better, Symbaloo allows you to embed your webmix (as I have done above) into just about any website or platform. This means that your students have EASY and clickable access to all of your links and tools at any point. 

Is creating your own webmix user friendly, too? 100% yes! Because Symbaloo has so many users, you can search for tiles, such as Google Drive or Outlooks, that are popular and pre-created by other users. This not only makes creation easy but it also saves you a ton of time! Can't find the tile you're looking for or want to create a tile that sends your students to a very specific website? No problem! Create you own with just a few more steps and you can even customize the image that will appear on the tile for your students to see! 

STILL not convinced that you need Symbaloo in your life and in your classroom?! Click HERE to read 11 ways that you could create a webmix to improve your teaching, parent communication, and even your lesson planning! 

Sunday, November 20, 2016

Saving TIME and Organizing Your LIFE

I've mentioned far more than once that what every teacher needs more than ANYTHING else is just more time. A teacher's time is so precious and valuable, and it's also something that we HATE giving up for no reason. This week I went on a hunt for ways to save you time and help organize your already hectic life! (You're welcome in advance!) 

First, and foremost, I used a VERY cool program called Adobe Spark to create a page of tips and tools to save you time and help organize your life. This is a resource that I cannot wait to use to create pages for my students AND to have my students create pages for projects and assignments. If you haven't already checked this out, PLEASE do yourself a favor and watch the short video below to learn more about Adobe Spark and all the features it has to offer you! 


Now, on to the page I created for you! 

TIME: A Teacher's most valued possession

BONUS: Click the links below to see a few more of my favorite time saving tools and organization tools to help you keep your sanity the rest of this school year!


  • Orange Slice - A Google Drive Extension that allows you to insert rubrics   for grading right into documents and files!
  • PlanbookEDU - A digital planbook that allows you to directly attach files and share your planbook with other teachers for collaboration!
  • Online Timer - A timer that ticks down like a bomb! Students love having the visual reminder of how much time is left watching the bomb explode!

Saturday, November 12, 2016

All you REALLY need in life is Google Drive...

In a previous post I talked about all things Google, including Google Drive. This week, I explored even further in the world of the drive and found some features and add ons that I wish I had known about even sooner. As mentioned before, Google seems to get better and better the further you explore!

The first feature that I stumbled across was an Add-On in drive that allows you to annotate PDF files. This add-on is called Kami and I can't wait to share it with some of my colleagues! Watch the short video below for a better explanation. 


As a teacher who is nearly paperless now, Kami is really the last feature I needed. Additionally, Kami has worked really hard to make this tool work especially for teachers. Are you already using an LMS and want to incorporate Kami into that? 

_________________________________________________________________________________
The second feature within drive that I find exceptionally useful is Google Forms. I know that I have written about Google Forms previously, but Google just keeps finding ways to make it better and better! Last time I explore Google Forms I made mention of the awesome add-on Flubaroo and how it made grading quizzes within Google Forms a breeze! Google apparently took notice to how many people were using Flubaroo because at the end of the summer, they began offering self grading quizzes as an option within Google Forms! It is limited to multiple choice, true false, drop down option questions, but this is still a HUGE step in the right direction for Google. The video below shows you exactly how to set this up if you're new to using Quizzes on Google Forms!

_________________________________________________________________________________

The final feature that I found useful in Google Drive was the Add-On Mindmeister! This tool allows teachers and students to create mind maps and graphic organizers quickly and easily! The layout of the tool is extremely user friendly and the Google Add-On allows you to insert a created mind map into any Google Doc or Slideshow! This would be great for having students either create their own graphic organizers or fill in teacher created graphic organizers! (BONUS: It works on iPads!!! This is the biggest selling point for me!)


Not only is this a fantastic tool for a writing teacher to have in their back pocket, but it Mindmeister also allows multiple users to be working on the same mind map or graphic organizer at a time. This collaborative feature makes this a useful tool for a teacher of just about any content!

Still not convinced you need to check it out? Watch the video below to get a better understanding of Mindmeister's capabilities and uses in your classroom!

Saturday, November 5, 2016

Learning Management System: WHAT is it and WHY should you care?

Learning Management Systems (LMS) seem to be ALL the rage right now in education. So what are they? Basically an LMS is a digital platform for students to interact with one another, receive digital lessons and resources, and turn in assignments. With the emergence of blended learning and digital learning, different LMS platforms have become more and more popular across the world. The video below gives an even more in-depth answer to explain exactly what an LMS is. 


So now you're probably saying, "This seems great and all, but why do I need one of the LMS platforms? What I'm doing works and has always worked!" To that I will add that today's students are living in a time that is like none that we've previously seen. Their futures will continue to revolve around technology and the use of all sorts of digital tools and resources. Why not incorporate what you're doing in your classroom every day with the technology and tools that they will need to succeed in their futures? 

You also are probably saying, "This seems great and all, but it also seems like a lot of work and like it would take a lot of time to set up!" To that I will add that you probably aren't wrong in thinking that initially. It can be a little bit of a learning curve when you are initially setting up your LMS and it will also take some time for you AND your students to get used to using it regularly. But what I can attest to is the MASS amount of time and energy that you will save once that learning curve is over. Think of all the quizzes and tests that will automatically be graded for you using these LMS platforms. Think of how quickly and easily you can give students feedback on assignments, or how efficiently you could grade essays and writing assignments. These platforms are designed to make the teacher workload LESS consuming but MORE powerful. 

MOST IMPORTANTLY I will add that you don't need to be technologically inclined to make one of these LMS platforms work for you, you just have to have a little bit of patience and be willing to try it. I'm not talking about looking at it for a few hours and deciding it's too much work upfront... I'm talking about REALLY trying it. Use it for a unit or a quarter and have your students give you feedback! You have to be all in to make this work for you. I honestly cannot image that you'll be disappointed if you do!

Need more convincing? Click HERE to read a short article about the Top 8 Benefits of using a Learning Management System in your classroom!
________________________________________________________________

This week I dove into exploring a few different LMS systems that I was not super familiar with. As a previous user of Blackboard and a current user of Google Classroom, I have to admit that I wasn't too enthused about trying ANOTHER LMS to see what it was all about. (Some of you may be reading this and thinking the same thing)... But after giving it a real try and letting myself explore the different tools and features available in some of the different options, I was pleasantly surprised. The two LMS platforms that I dove deeper into were Schoology and Edmodo. I had heard of both of these platforms before but had done very little research into how they worked and what they had to offer. What I found was that the two are exceptionally similar in use, but that the outlay and look of them is very different. Edmodo takes on a bit of "Facebook" style look and seems to be built to look more like a social media site. Schoology is a bit different and is organized more by assignment, quiz, or resource. Both of these platforms offers one tool that I feel Google Classroom is really missing: Connectivity. In Schoology you can search for resources and ideas that other educators have made public and shared with the Schoology community. In Edmodo you can join "groups" where other likeminded teachers share lessons, resources, and even assessments with one another. These connectivity pieces really allow you collaborate with other educators across the country and could even be used as a digital collaboration tool for teachers within your building! The image below shows some of the similarities and differences between Schoology, Edmodo, and Google Classroom. 
Overwhelmed about which LMS to try? Here are my thoughts... If you're just starting out, I don't think there is a wrong answer for which LMS to use. I think you have to choose the one that feels the most user friendly for you and your students. Even after seeing all of the awesome features of Schoology and Edmodo, I don't know that I will switch from using Google Classroom because I am familiar with it, my students are familiar with it, and it does everything that I need it to do right now. There isn't one right answer. And there are FAR more choices to choose from than just these three. I won't even go as far as to recommend one over the other, but I will say that you need to do your research before you make that decision for your classroom. Not sure where to even start? Click HERE for a great article about what you should consider before you make that choice. The most important thing is that you MAKE THE CHOICE to use an LMS in the first place! You will thank yourself later! 

Sunday, October 30, 2016

Tweeting your way to a stronger PLN

Your Personal learning Network (PLN) is a fancy way of saying how you connect with other people to continue learning. How you do this is different for everyone, but this week I dove into finding new, digital ways of exploring and expanding my own PLN. One of my favorite PLN tools is Twitter! Not sure what Twitter is or how to create an account? Click HERE for a quick and dirty rundown! I use my classroom Twitter account almost daily in a couple different ways. First, and foremost, I use Twitter to share information, announcements, and student work! Twitter is a fantastic platform for students and PARENTS to see information and pictures of what is going on in your classroom! The students absolutely love seeing themselves and their work being tweeted out and parents love the idea of getting that glimpse of what their student is working on in class delivered right to their smartphone or computer. 


If you're already using Twitter, the video below gives some great tips on how you could take your classroom Twitter to the next level! 


Additionally, I use Twitter to connect with other teachers and educational companies! Because you can search hashtags on Twitter, you can find tweets about nearly any topic. I love searching #edtech to see what people are talking about and what resources and tools are being shared around! It is a quick and easy way to pulse what's new in the Ed Tech world! As you've heard me say before, I don't have TIME to do anything but take a quick pulse on just about anything! 160 characters is just what I need to easily browse through, find what I want and pass by what I don't! 

Interested in Ed Tech? Check out the Twitter users below who tweet out some fantastic Ed Tech based resources, tools, and articles! 

- @ShakeUpLearning
- @spearheadedtech
- @coolcatteacher
- @WilCodilla
- @KerryHawk02

Interested in searching some Ed based hashtags? Try searching up the hashtags below to find some amazing users, articles, resources, tools, and more!
- #edchat
- #edtech
- #edtechchat
- #GoogleEdu
- #CSEdu 

Don't forget to follow ME on Twitter @MissKingSMS for more #edtech and #EnglishEd tweets!


Sunday, October 23, 2016

Blogs, Blogs, all types of Blogs!

This week's focus in the EdTech world was focused in on Blogs! I'll be the first to admit that I am not one to seek out blogs to read through.  A large reason for this is because I just haven't had the time to sit down and read through some not-so great blogs to find the really good ones. I use Twitter far more than I read blogs because the information is chunked into smaller, more simplified titles that I can quickly browse through to see if I actually want to read the article. What I took away from this week's exploration into blogs is that many of the people I follow on Twitter and really enjoy also have some pretty amazing blogs! 

Additionally, because I like the platform and setup of Twitter, there is also an amazing tool called Feedly that allows you to input the blogs that you follow and it will populate all the new posts from each of the blogs in a very visually pleasing way. For a quick rundown and a much better explanation on what Feedly is and does, watch the video below. 


This tool now allows me to QUICKLY browse through blog posts from my favorite Ed Tech bloggers and I can choose which to actually read and which to pass by. I've also added the Feedly app to my iPhone and my iPad because, as mentioned before, time is the biggest issue when it comes to reading this great information that these insanely smart individuals are putting out into the world. That's every teacher's problem, right? There just isn't enough time in a day. Well the Feedly app lets me quickly have access to all of these blogs in ONE place and even if I only have 5 minutes to browse through them during my lunch break or as I am waiting on a student, I know that I am using my time efficiently! 

Give it a try! I'll admit, I was skeptical at first but have been very pleased so far with the web based tool and the app. Not sure where to start? Sign up for a free Feedly account by clicking HERE! Not sure which blogs to follow after you have an account? Below is a list of some of my favorite blogs to help get you started!

Sunday, October 9, 2016

Google Sites

This week in my Google Adventures I tackled Google Sites. I'll be honest here... I have not had positive experiences with this tool in the past and have felt that it is very clunky and not easily navigated. When I first got into this adventure this week I remember making several remarks about how the design and layout of the website itself looked like it was something directly out of 1998. 
Take a look below to see what I mean...

That being said, I did find myself really enjoying that process the more I got into it. Google Sites is a tool that allows you to basically build your own website for free. You can change the template, the look, and the layout of your website and individual pages. As mentioned before, the navigation is a little frustrating at first, but once you get the hang of it, the process is pretty painless. If you are starting from scratch on how to build your own site, the video below really helped me familiarize myself with some of the common tools and features that are available to you while you are building. 


Some of my favorite features within Google Sites include the ability to embed documents from your Google Drive directly into a page, HTML coding and embedding capabilities, and the ability to include direct, live links to any page. The image below is a screen grab from the site I created. I was able to include an example essay I had in my Google Drive directly onto one of the pages on the site. 


After playing around with the Google Sites and taking the time to actually sit down and build a site of my own, I definitely do see some of the benefits. As a teacher who previously used Blackboard and has switched to Google Classroom, one of the things that I really miss is the ability to have a place to store information and resources for my students all in one spot. Google Classroom is AMAZING in terms of learning management system that lets you turn in assignments and complete formative and summative assessments. My hangup has been not really having a well thought out way to deliver content and information to my students all in one place that was easy for THEM to navigate. I could add several folders into the "about" section of Google Classroom, but it doesn't look very clean and students often have a hard time locating specific information inside them. Realizing this, I chose to create a Google Site that would act as a storage space for content and resources that my students would need to have for an informative research and writing unit. On the site, students will have all of the information they need to learn how to READ informational texts and take notes on them, RESEARCH specific topics and find credible sources, and WRITE a strong, informative essay about the topic of their choice. The site houses important documents from my Google Drive, links to level-appropriate articles, a custom Google Search engine, videos, slideshows, and a plethora of other resources for my students to utilize. Click HERE to check it out!


Google Sites isn't perfect, but it ended up being exactly what I have been looking for. It was a lot of work up front, but I know that having all of these resources, tools, and information stored in one spot for my students will pay off exponentially in the long run! 

Sunday, October 2, 2016

Google Earth and Google Tour Builder

I'll be honest, Google Earth and Google Tour Builder are two areas of Google that I do not feel exceptionally strong in. After fully immersing myself in the two this week, I now see the positive implications that both could have in the classroom. Both have different strengths, in my opinion, but are valuable and teachable in their own ways. Let's take a look at both...

Google Earth
If you're like me and feel like you need a beginners guide to how to even get started with Google Earth, click HERE. This short tutorial video really helped me understand the ins and outs of the program. The biggest takeaway I had from using Google Earth is that you really need to just play around with it for a short amount of time before you try to do any specific tasks. I had to click around and explore for about 7-10 minutes before I felt comfortable completing what I was truly trying to do. Because of this, I believe that the same would be true for my students using it in class. They're going to need some extra time to just play around and explore the program before completing assignments within it. This was an important "ah-ha" moment for me, as a teacher! In terms of teaching with Google Earth, I think one of the most powerful teaching tools it offers is the 3D models it allows students to understand. With a flat map in a textbook, students are only able to visualize so much. Google Earth really breaks that dilemma wide open and lets them have a much more detailed and accurate portrayal of the world in which they live. Personally, I see this as more of a TEACHER tool for teaching my students about specific areas of the world or pointing them to this tool to find specific information, but he possibilities are truly endless with this. Just in case you need a place to start from, click HERE to see how others are using Google Earth in their classrooms already! The video below is on the would be a great anticipatory set for introducing this tool to your students. 


Google Tour Builder
Google Tour Builder is a little more straight forward, if you ask me. I had very little experience with this tool prior to this week's exploration, so if you need a quick rundown on how to get started, I found THIS short video quite helpful. What I love the most about this tour is it's simplicity. Adding the locations for your tour is a breeze and all the other information that can be added is laid out in a format that is easy to follow and easy to accomplish. Google has done a great job of making this tool exceptionally user friendly! This tool, in my opinion, would be much easier for students to use to complete tasks. For example, it would be relatively simple for students to create their own tour over a specific region in Social Studies class, or over the settings and locations they read about in a novel in English class. I see this tool as much more of a STUDENT tool rather than a teacher too, and that is why I think it is even more powerful. The assessments that students could complete by creating an interactive tour of their learning is a pretty powerful tool! Below is a screenshot of a Google Tour over one of the novels in my students' current literature circles, The One and Only Ivan by Katherine Applegate. 


The complete tour, which can be accessed by clicking HERE, includes maps, street view images, still photos, and videos about each of the locations in the novel. This would be such a cool way for students to tell their own stories or to map the stories that others have created!

Overall, I think both of these tools have a lot of potential and would be excellent additions to any classroom. It was refreshing to see how many teachers outside of social studies and geography are using these tools in a meaningful way. Google is for EVERYONE, people!!!

Sunday, September 25, 2016

YouTube in Google Classroom and Build with Chrome


This week's Google Adventures took me all over Google and it's partner companies to explore some lesser known tools. YouTube was my first stop. I thought I knew just about everything there was to know about YouTube, but just like with Google, the more I dug the more I learned. (If you're not already using YouTube in the classroom, click here to learn why you should be!) One of the coolest discoveries I made was the simplicity of integrating YouTube within Google Classroom. Ever since Google bought out YouTube the two have been working side by side and with Google Classroom, this could not be any easier. You are now able to quickly upload YouTube videos to your students' stream with just the click of a button. The screenshot below show what that looks like. 


As you can see, the YouTube button lets your easily add a video directly to any announcement, question, or assignment right when you are creating it. In the example above, I have asked my students to watch the short video clip and then answer a question about the type of conflict they are seeing in the clip. This will be a FANTASTIC tool for formative assessments that are quick and engaging for my students! I am so thankful that Classroom added in this feature and that YouTube is so easily accessible to both me, as the teacher, and my students! 


The second stop on my Google Adventure this week was a tool that I had never even heard about: Build with Chrome! I don't even know how to describe this in a way that will properly do it justice, so watch the short video below to understand what Build with Chrome actually is. 


You guys! It's LEGOs.... in the real world! Build with Chrome works alongside Google Maps to let you build ANYWHERE in the world. People are building national monuments, historical landmarks, famous buildings, etc. out of legos ALL across the globe and they're putting them in their geographically accurate locations! This means if you were studying ancient Egypt with your students they could go to Egypt in this program and build the pyramids right where they were actually build! This means if your students were reading a novel that was set in Paris and a major scene from the novel was centered around the Eiffel Tower, your students could go to Paris in this program and BUILD that entire scene right where it happened in the novel! I am so impressed with this program and the collaborative effects that it brings to the table. I think this is an extremely powerful creativity booster and the possibilities of the use of this tool in the classroom seem endless! Click HERE to see how an art teacher uses Build with Chrome! The best part (for me anyway) is that this program does NOT use Flash which means my students can do this from ANY of their devices, even their iPads and cell phones.

Do yourself a favor and go check it out. Explore. Spend a class period just building with your students. I promise you won't be disappointed. (P.S. Check out the builds that are in your local area. Odds are that someone has been building near you. I'm especially proud of whoever has been building in my area!) Rock Chalk!!!


Sunday, September 18, 2016

Google Calendar

I've dabbled with Google Calendar many-a-time over the last few years. Since almost all of my devices are Apple products, I've had issues in the past with sync capabilities and seamless sharing. This week I took a deeper dive into the inner workings of Google Calendar to see what was new and how I could make this tool work better for me. (If you are new to Google Calendar, click HERE for a walk through on how to get started)

I started out on a mission to create a basic school calendar with building wide events as well as games and practice schedules. The initial goal was to then be able to share this calendar out with my students as well as their parents so everyone would be on the same page for when I would be available and what was going on in the upcoming weeks. I am the girls' basketball coach in my building so staying after school to work with students is sometimes tough with a hectic practice and game schedule. This calendar would help both students and parents see my availability during the season. What started out as a well intentioned idea, quickly became EXTREMELY frustrating as I realized that my district restricts viewing on Google Calendars created from a district account to ONLY those within the domain. This means that I would be able to share this calendar with my students, but parents would not have access to the calendar. After a few hours of trying work-arounds, I realized there was no way I could make this a reality. My tip for ANYONE creating a calendar they are wishing to share outside of their domain is to first check your settings to see if sharing to recipients is even an option for you. I created the video below to show you how to quickly do this with any Google Calendar you have created or that has been shared with you.


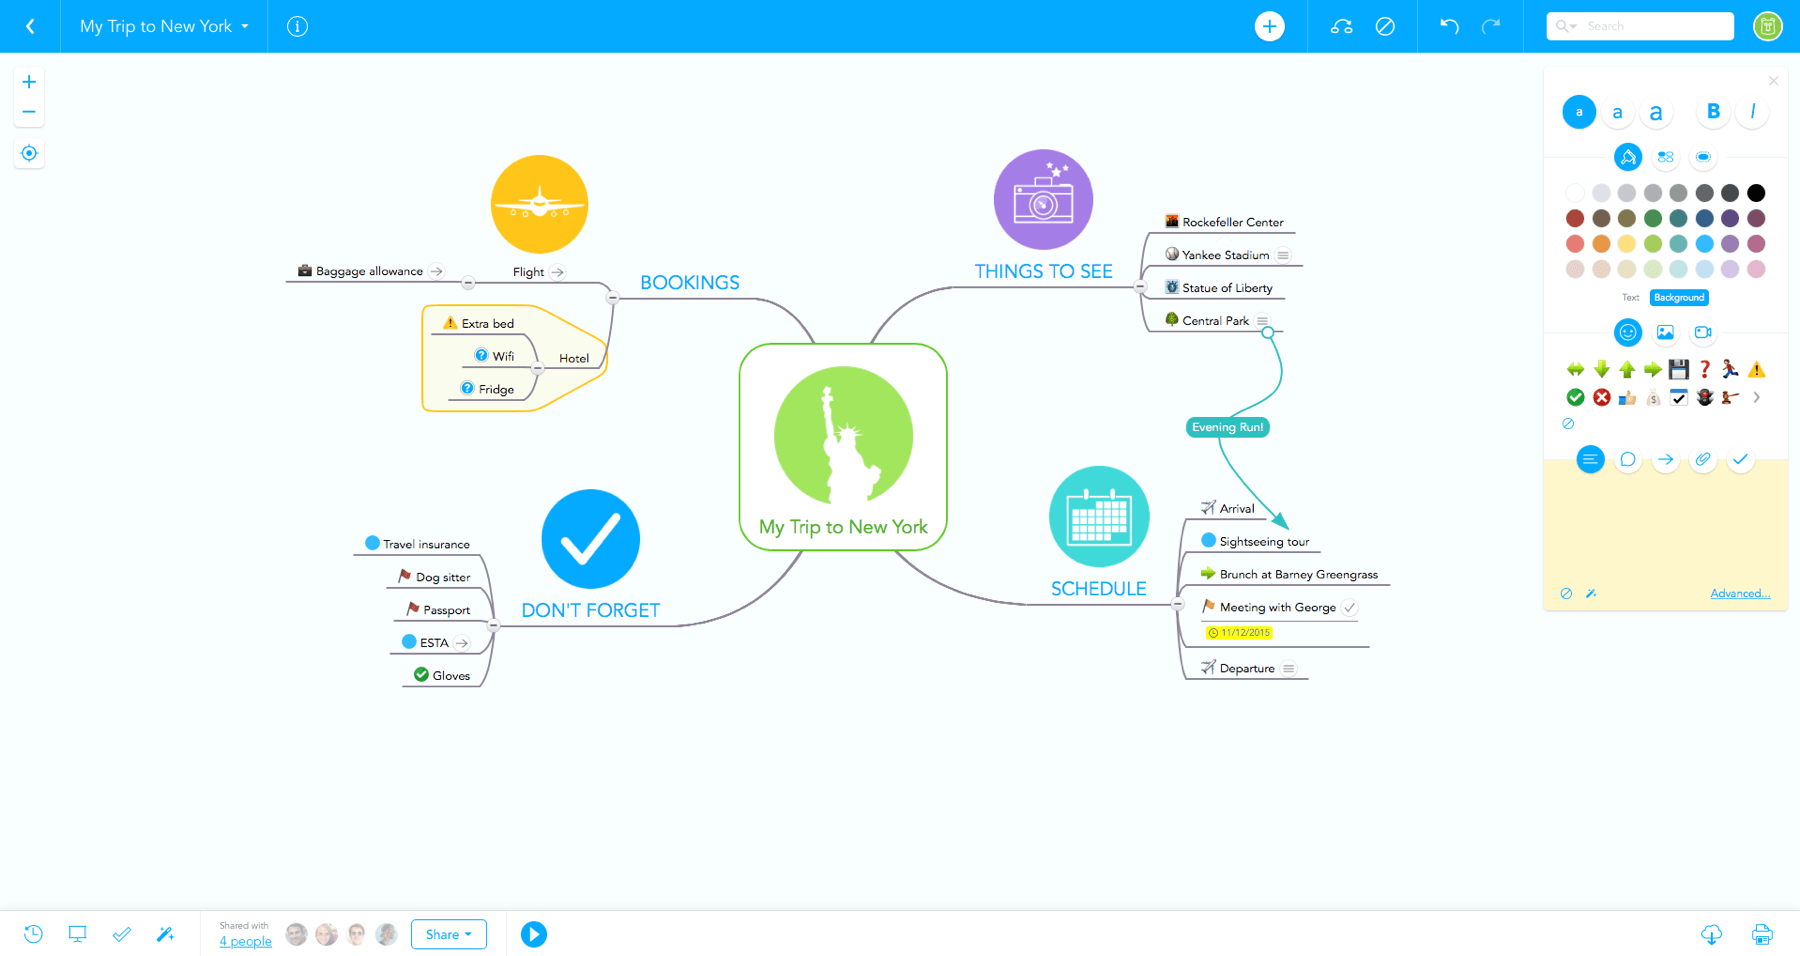
Because this was such a headache and I had to play with settings and options, I did learn a couple of new tricks in Google Calendar! (Silver Lining!) The first trick I stumbled across is customizing the calendar view that you can embed into other websites. This is fantastic because you can control the size of the calendar based on pixels and can even scale it down to where it looks pretty dang good on a mobile phone. See the screen grab below on how to do this. 
The second tip that I stumbled across when trying to figure a way out of this headache was that you can now export your Google Calendar to a .ICAL file. This is HUGE for Apple users everywhere. What this means is that you can now export a Google Calendar directly to your iCal app on your MacBook, iPhone, and iPad. I tried it with the new calendar I created and it works perfectly. This would be an AMAZINGLY easy way to send the calendar directly to my students who all have iPads this year. I could create a calendar for each unit and email it to students OR simply upload it to Google Classroom and then students would simply download the file and it would automatically sync with their iCal app on their iPads. I am SO happy that this feature now exists and feel that I truly will use Google Calendar more now that I know it is more cooperative with Apple products! To learn more about exporting your Google Calendars to the .ICAL file type, click HERE!

Thursday, September 8, 2016

Google Drive

Google Drive seems to be an endless amount of awesome. Every time I feel like I have mastered Google Drive, Google releases something else that completely changes the game and makes my job as an educator a little easier than the day before. While exploring Google Forms this week in Google Drive, I found a newer, built in tool that does just that! (New to Google Forms? Click HERE for a Google Forms 101 session) Previously, I had used Google Forms to give my students quick assessments for quizzes, exit tickets, and to check for understanding. After creating the form, I could then easily export my students' answers into a Google Sheets document to grade. Last year I stumbled upon an "Add On" in Google Sheets that would AUTOMATICALLY grade those quizzes, exit tickets, and checks for understanding. This teacher's dream add on is called Flubaroo. The video below shows how it works!

Flubaroo works great, but my only real complaint was that it got to be a little time consuming when I was having to juggle two different programs and then run an "Add-On" and then also transfer those grades into my district's online grading system.What I found this week is an even easier way to make this happen IN Google Forms! Google has now added a "Quizzes" option to their Google Forms sheet that grades itself in the same program! Even though it is just a slight change, it eliminates two to three steps of the process. Nobody knows that time is precious more than a teacher! Watch the video below for a demo of the on-demand grading within Google Forms.

As much as I love Google Forms and the ease of the process, I will say that the one downfall of using Google Forms to self-grade over using Flubaroo in Google Sheets is that it limits the type of questions you can ask in your quiz. Multiple choice, checkboxes, and drop-down questions are the only options available for the Google Forms self-grading system. If you choose to use Google Sheets + Flubaroo instead, you can also add in short answer questions. As an English teacher, I REALLY appreciate that added question type that is ideal of fill in the blank questions and even single answer open ended questions. Both features have their strengths and I will continue to use both in my classroom! The immediate data that Google Forms lets teachers gather about their students is truly invaluable. Let Google do the hard stuff. You just reap the benefits!

Friday, September 2, 2016

Custom Google Search Engine

This week in my exploration of all things Google I dove into all the interesting features of the Google Search engine. Having done numerous research projects myself while getting my undergrad, I felt fairly comfortable with filtering through content to find specific file types, publication dates, and specific or generic titles (If you are not familiar with the filtering options available to you in your Google Searches already, Click HERE to see a step by step guide of how to do this). These are fantastic features and I use them frequently, but the one feature that I was not familiar with and that completely blew me away was that I could create a CUSTOM Google Search engine for my students to use when researching!

Each year I teach a research and informative writing unit over Computer Science topics. Computer Science is something that I feel is exceptionally relevant to my students and also something they really enjoy exploring and getting involved in. That being said, it is a constant battle to find up to date information and content that is also reading level appropriate for 6th grade students.... BUT. THIS. CHANGES. EVERYTHING. Google allows you to input specific websites that you want your students to be able to search within. From the list of website you put in, the search then looks for any keywords the students type in, but ONLY on those specific sites. Some of the sites I chose to use can be seen in the image below.

Since I have students at, above, and below grade level in reading, I included sites like News ELA, Scholastic News, TIME for kids, Discovery Ed, and Kids, Code, and Computer Science to ensure that the materials my students were finding were all appropriate for them to read. Give it a shot below! Since this was for a Computer Science research topic, type in any computer science related keyword (robotics, virtual reality, coding, 3D printing, etc.) and see what my custom Google Search Engine brings up for you!


This will make research so much easier for my students AND I will know that they are taking notes over quality material as well as citing quality sources. Additionally, this takes out the risk that they might stumble across articles that are way higher than their current reading level or articles that may not be age appropriate for them to be reading. You can also customize how the search bar looks in terms of color, font, size, etc., and you can manipulate the layout of how your students' search results will look on their screen! Interested in giving it a try for yourself (and your students!)? The video below gives a step-by-step tutorial on how to create your very own Custom Google Search Engine!


Sunday, August 21, 2016

Google Chrome Browser

I have been a Google Chrome Browser user for several years now, but I feel like there are constantly new features and add-ons that I am learning about and exploring. If you do not use Chrome already, click here to download it for free! This week I focused on adding in some additional extensions to my browser, including Google Classroom and Google Translate. Last year I ran a completely blended classroom using Blackboard as my learning management system (LMS). This year, because my district has gone 1-to-1 with iPads, I have chosen to switch to Google Classroom as my LMS. The Google Classroom chrome extension allows me to quickly add articles, links, and videos to a specific class in the app for my students. Additionally, I also have ALL of the 6th grade ESL students on my team this year. Because of this, I have several students who speak little to no English in my English-Language Arts classroom. The Google Translate extension is going to be used an exceptional amount this year for readings and for discussion with classmates. If you have students who do not speak English as their first language, this extension and this app are a game changer for your classroom! Check out the short video below to see just one of the awesome features of this of extension and app called Tap to Translate!